With today being Labor Day, fall is officially here. Although, it is still 85+ degrees here in Virginia. I’ve been bad about making new wreaths all summer so I have had the same one on my door since late April. I love fall crafts so I was very excited to finally make a new one for September. I will probably make another for Halloween, but this one can hold me over until then, and throughout November.
Originally I was going to make a burlap loop wreath. I went to Michaels and got my supplies but by the time I finished with one roll of the burlap, I realized I had not bought enough. So, back to Michael’s I went. However, when I got there I realized I had bought all the burlap they had in stock. Instead I chose this tan and green striped ribbon which was a thicker canvas-like material and turned out really cute. However, I will say that using burlap is much easier as it holds the shape of the poofs much better than the ribbon.
This was also my first time being able to use a W initial on our wreath for my new husband and I’s last name! Pretty exciting 🙂
This wreath is pretty simple, but time consuming. Once you get in the groove it is certainly not difficult, but it will take up a few hours of your time so be forewarned. It was also fairly inexpensive. All of the supplies cost about $30 total, with using my 20% off coupon.
What you need:
-12″ wire framed wreath (the ribbon will make the actual wreath appear larger)
-Several rolls of thick wired ribbon, or wired burlap for your base color (I purchased 4 and used almost all of the ribbon)
-One roll of hick wired accent ribbon (I chose an orange glitter chevron)
-One roll each of medium and small decorative ribbon, without wire
-Pack of pipe cleaners
-Decorative fall flowers
-Wooden initial
-Hot glue gun and glue
-Scissors
What to do:
- Cut your pipe cleaners into thirds to have smaller pieces handy. Unroll your thick base ribbon completely off of the spool. Gather one end and pinch together. Attach the ribbon to one of the support bars of your wreath frame with a pipe cleaner. Be sure to twist your pipe cleaner several times to keep the ribbon in place.

2. Starting from the inside of the frame, begin weaving your ribbon through the frame, over one bar, then under the next.

3. Gather up the loops made by the weaving and puff them out. I typically make each puff approximately 2″ high.

4. When you have reached the outside out of the frame, weave your ribbon the opposite way, toward the inside of your frame. Please note that if you are using burlap ribbon or a solid color that looks the same on both sides, you can keep weaving without flipping your ribbon. However, if you are using a patterned ribbon like mine, you will want to twist your ribbon right before you begin weaving back toward the inside, to ensure that the pattern is facing out.

5. Continue weaving and puffing out your ribbon. I did about six weaves (3 outward, 3 inward) in each section of my frame. Make sure you are gathering the ribbon together to create a full look and tight loops.
6. When you have reached the end of your ribbon, simply pinch the end and attach it to the wire farm with a pipe cleaner, just as you did with the beginning. Be sure to attach at the back of your wreath.

7. Start a new spool of ribbon and repeat until your wreath frame is full.

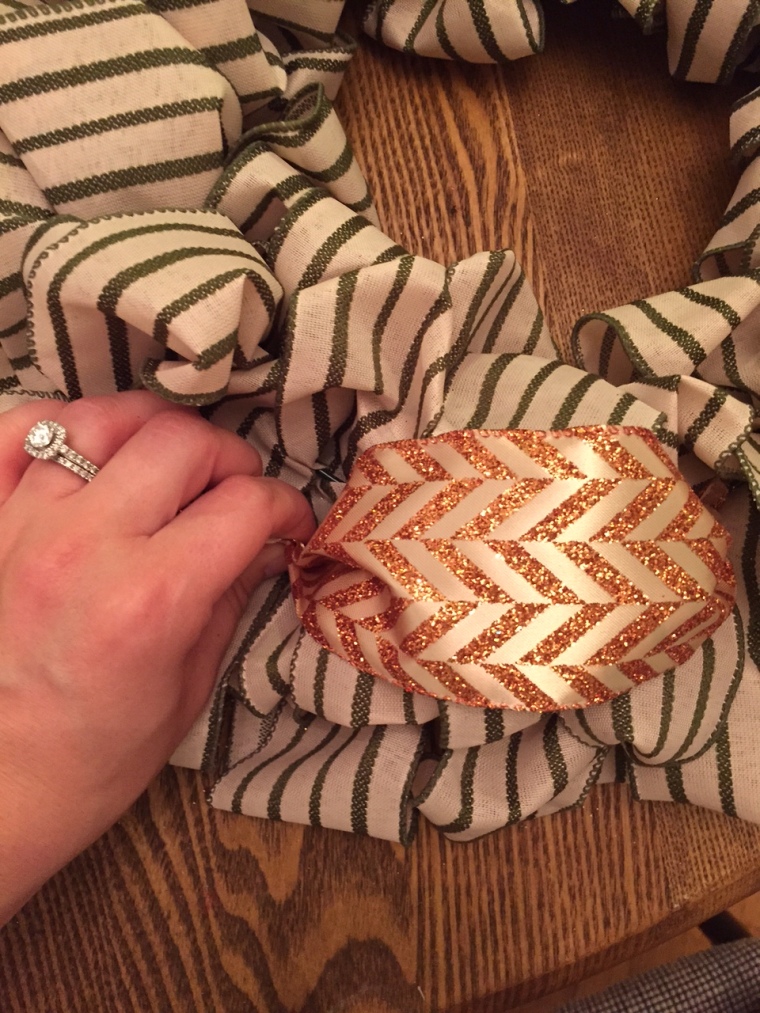
8. Now, to add your large accent ribbon, attach one end to your frame with pipe cleaner, right in the center. Make sure the long end of the ribbon is pointing up. Create a little poof or bubble with your ribbon, over top of your base. Pinch together and attach with a pipe cleaner, again in the middle of your frame.
9. Continue this until you have attached the accent ribbon all the way around your frame. Cut off the excess and tuck the tail into the base ribbon so that it is hidden. If your base ribbon is tight, your accent ribbon will stay in place just fine.

10. For the decorative ribbon, cut 5-6″ pieces of your medium and small ribbon. Cut a V shape into your medium ribbons to give the ends a more attractive appearance.
11. Layer the small ribbon on top of the medium ribbon and pinch together. Bend a pipe cleaner in half and wrap around your decorative ribbons.

12. Attach to your wreath sporadically where it appears it needs some filler, twisting the pipe clearer at the back of your wreath.

13. Stick your decorative flowers into your frame, wrapping the wire stems into the wreath frame, or using hot glue, depending on your type of flower. Attach your wooden initial with hot glue.
You’re all finished! Once you get the hang of the weaving, this wreath is really easy and fun! There are so many options you can make with burlap and ribbon wreaths for every holiday, occasion and style. Have you tried a burlap weave wreath?


